How do I build a strong photography portfolio?

Female photographer building an image gallery on her website with a laptop

Building a photography portfolio isn’t just building a website to upload all of your favourite pictures and hoping that people will engage with them. There are many different approaches to exhibiting your photos in a way that will highlight the quality of your work, and we have put together a list of top tips so that your photography website will stand out from the crowd and showcase your skill. 

Take more photos

Get out there! The more photos you take, the more experience you get shooting different subjects and in different environments, which will help you develop your skill and creativity – check out these top tips on taking more interesting photos if you’re struggling for inspiration. If you’re just starting out in the photography business, you might need to take cheap or unpaid gigs to start with. Use your friends as models, shoot events for charity or ask to be a second shooter to professional photographers – but make sure you can use the event photos for your own portfolio! One tip – don’t shortchange yourself for too long. You may think you’re inexperienced, but offering free or extremely reduced rates devalues both your work and the profession at large. 

By putting yourself out there and trying new things, it will be easier for you to create your own style, which is a crucial element in designing your portfolio.

Think about your target audience

What are you making a photography portfolio for? Is it to get a job, start your own photography business, or just to exhibit your work in one place? This is key to understanding your audience, as you want to show them images that they want to see. If you are trying to get into wedding photography, for example, you don’t want to upload your pictures of scenery or floral close-ups, no matter how beautiful they are. Upload images that your audience will want to pay you to create. 

Select your featured images

This is never going to be easy, and it might take a long time – that’s ok. In a photography portfolio, you are only as good as your worst image, so this is a crucial step to wow your audience. 

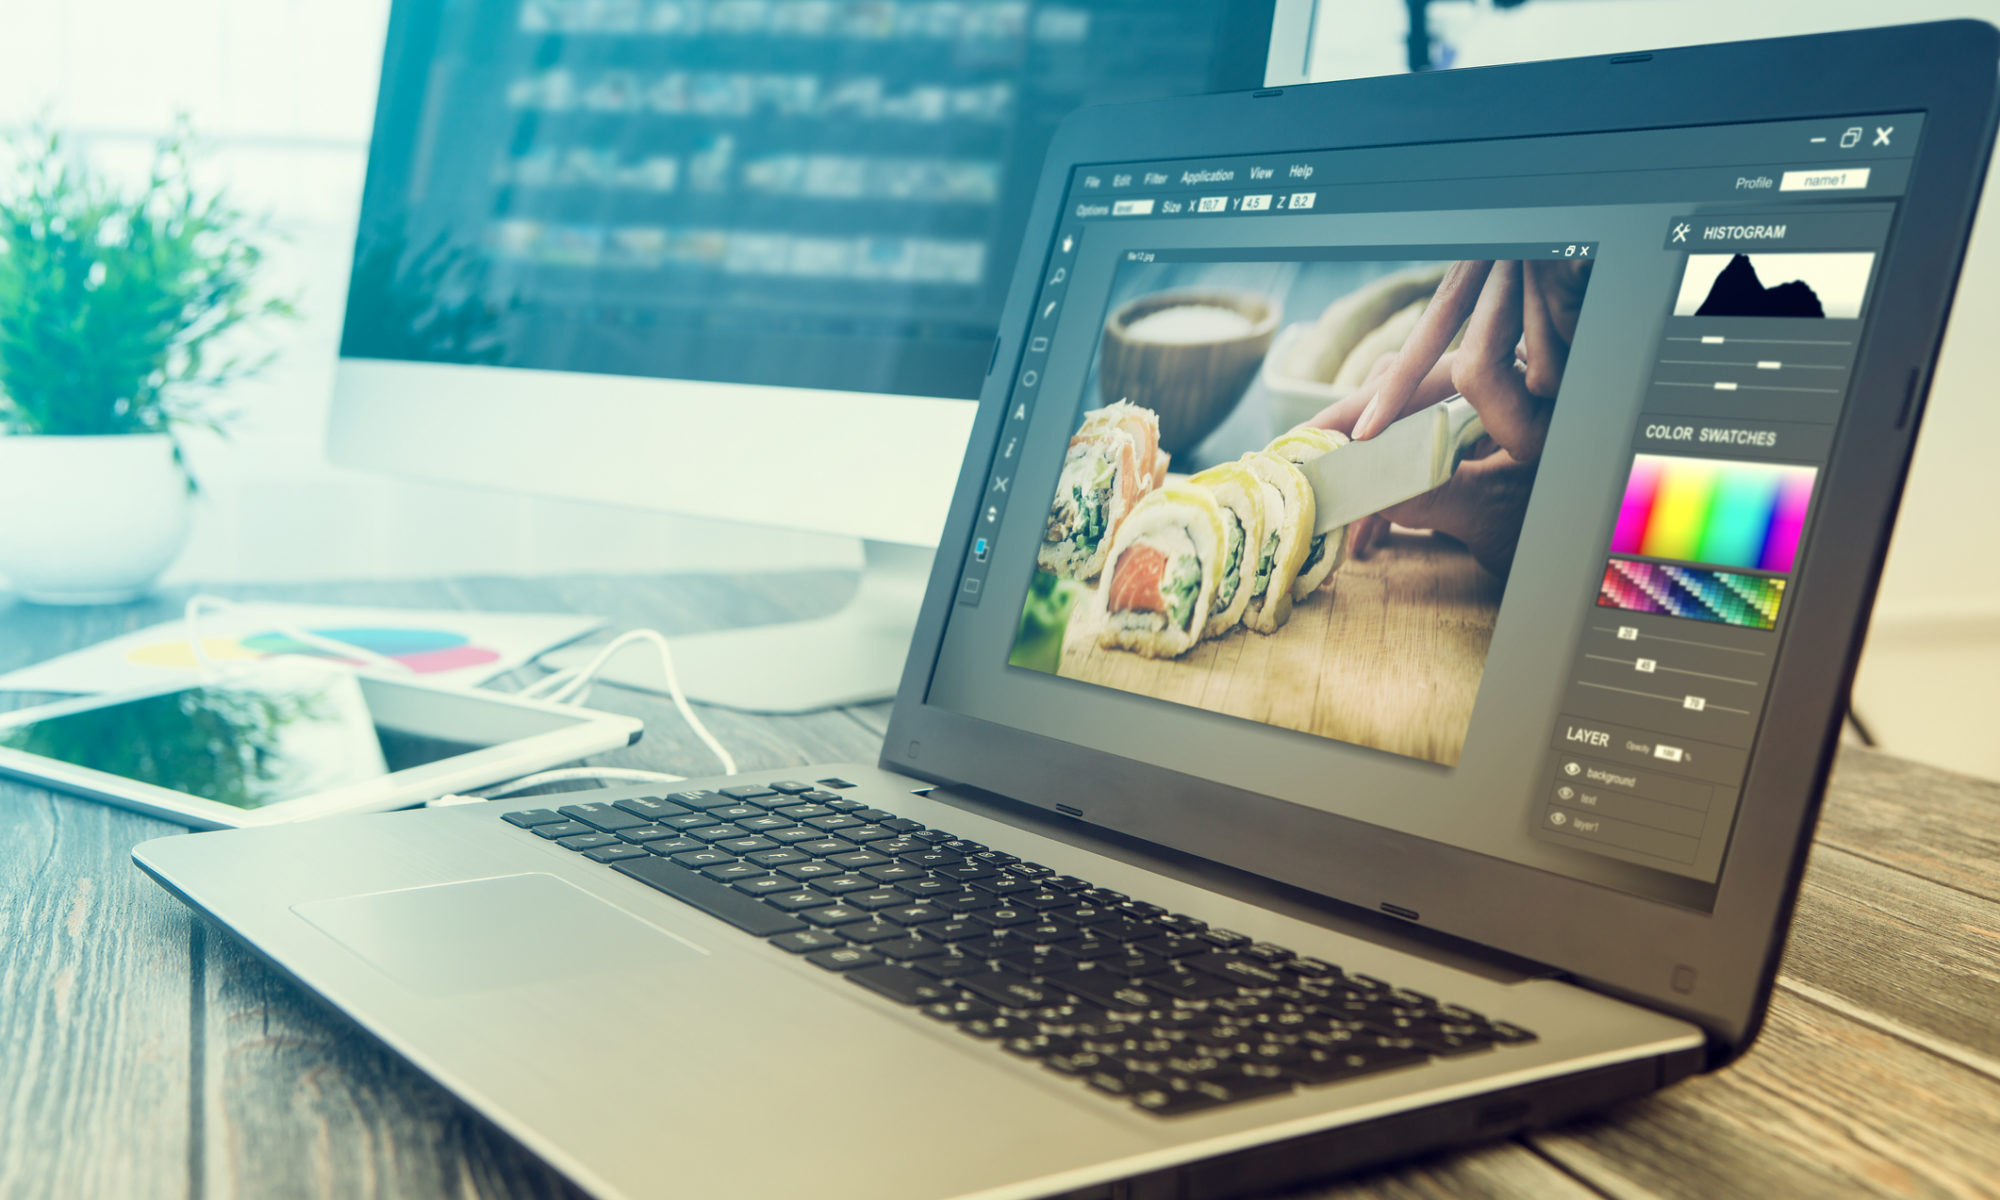
Your website builder should have an image gallery to embed onto the site, but think of your featured image gallery as a sneak peek into your work, so don’t upload hundreds of pictures. Instead, choose a handful of photos that represent you as an artist. Great photography portfolios have varied images, but they are all in one style – this is what will set you apart. Don’t make it look like you are copying loads of different artists! Keeping all your photos within your personal style creates a strong visual identity and will help your clients remember your work and decide if you are the artist they’re looking for. 

Layout

Do some research on other photography portfolio websites. A clean, simple homepage is best as it makes your photos the main attraction. Don’t crowd the page either, make sure you leave some negative space between the images so that they stand out. If you are trying to showcase your versatility, put your photos in different categories – mixing newborn photos with late-night event photography can be jarring for a viewer. 

The order you put your images may seem arbitrary, but it is a critical decision! On a basic level, you want your first and last images to be some of your best, as these are what the viewer will remember most, but ideally you want to think about the order more deeply. You can order them according to mood, composition, colour or movement, but you want them to flow and tell a story. You want your visitors to be moved by your images, as this will make sure they don’t forget your work. 

Keep it simple

This is a delicate balance. You don’t want to fill your photography website with unnecessary elements or crowd your photos with a wall of text. However, you want your viewers to have an emotional connection with your images. Include a short caption describing the photo and where it was taken for each image, but if you have a short sentence-long story behind the photo that adds to the image, post that as well.

You are not alone!

As a photographer, it’s easy to stare at your photos so long you can’t work out if they’re good or if you just have a personal connection with them. Ask for feedback as much as you can, from friends, family, professional photographers or even someone you trust in your target market. Ask them how your photos make them feel, and whether they have questions about them they want to be answered. 

Beautiful images, beautiful website

If you’re still looking for a website builder to showcase your photos, then Go Sitebuilder is a great option! With beautiful themes preloaded onto the website builder and image gallery plugins just a click away, you can have a professional photography portfolio website up and running in minutes. Try our 14-day free trial today to see how you can make your photos stand out against the competition.

How to edit the images you use for your website

How to edit the images you use for your website

The visual aspect of website design can attract or turn away visitors, therefore when creating your website it is important to choose images that create an impact and relate to your brand.  Rather than just focusing on the content of the images, however, it’s vital to make sure that you take into account other aspects, such as file type and quality to really highlight your website and make it stand out from your competitors. Here are some considerations we think are really important when ensuring your website leaves a lasting impression.

Think about the quality of your images 

The quality of your images can significantly impact the way customers view your website and your brand. High-quality images imply a professional service and instil more trust in your brand for customers than images of low quality. The best ways to achieve high-quality images is either by taking them yourself (see our article on How to Take Great Product Photos) or by using stock images to ensure the quality is high. 

Know the type of file you need to use

When adding images to your website it is important to know the type of file you need to use. Generally, this is a choice between a PNG file and a JPG/JPEG file. A PNG file is a larger file, which creates higher quality images than a JPG but can slow your site speed down if used too often. A JPG file, however, is used more frequently as the file size is smaller; the only compromise is that its image quality is slightly lessened. 

Think about composition  

A good website will have images which engage the visitor and mean something to the brand or subject matter. Therefore the composition (how the image is ‘staged’ and shown to the viewer) should be taken into account when selecting your final images. A simple crop can change the focus of an image and make it more relevant when building your website. The built-in image editor on Go Sitebuilder is a perfect addition when cropping your images as you can visualise how small changes can impact how the image is shown on your website.

What about colours, filters and stickers?

Depending on your brand image, aspects such as colours, filters and stickers can portray the personality of your brand. For example, a travel website may benefit from brightly coloured images to show locations in the best light. Whereas a beauty website may have more use for filters.

If you are looking to build a website for your company, then look no further than Go Sitebuilder! Our simple design means you can have a professional-looking website up and running in minutes, and we even have an image editor built into our website editor. Try our 14-day free trial today!

What are some good online photo editing sites?

Close up, side angle view of a laptop on a desk displaying some photo editing software

If you’re looking to edit your photos, but you don’t want to waste precious hard drive space downloading software to do so, then try out these photo editors that you can run directly from your browser! They’re fast and convenient, and perfect if you’re editing images that you will use online – if you’re building a website for example, or posting to social media. However, bear in mind that if you’re printing images in high quality, you might be better off downloading image editor software.

Fotor

Fotor is a simple and fast photo editor that will help your photos stand out from the crowd. It has a huge variety of filters that you can choose that can help fix standard image issues – like low light or overexposure – without having to get into the complex world of saturation, hue and contrast. It also has a “batch” tool, meaning you can apply the same filter or edits to a group of photos – perfect if you want to cover up a recurring issue across multiple images.

One of the negatives of Fotor is that it doesn’t have the tools to work on specific areas that need retouching, which lets it down a little. 

Canva

A basic photo editor, Canva is both streamlined and fast, and has a super-simple editing interface. If you’re brand-new to editing photos and are looking for pre-loaded filters and templates, then this is for you! You can also adjust brightness and colour, and it includes tools to crop, resize, flip and rotate your image. 

Canva also includes backgrounds and other graphics to inspire you, giving you the tools to create original graphics for your company. The free version includes 1GB of free cloud storage, but if you run out of space you can upgrade to the paid option. 

Pixlr X

If you’re looking for a little more than just adding filters and playing with brightness, Pixlr X is one of the more advanced online photo editors you can find. You can combine multiple images, sharpen and blur images, but unlike most online photo editors, Pixlr X also supports layers, giving you a lot of freedom to play around with different edits before choosing the best one.

It runs on HTML 5 rather than Flash, meaning it will be compatible with any modern browser, and has a sleek interface that is slightly more complex than Canva and Fotor, but reflects its capacity for more advanced tasks.

If you’re building a website, you need to make sure your images impress – low-quality graphics are a sure-fire way to put visitors off! Try out Go Sitebuilder’s 14-day free trial to take advantage of our simple interface that helps you create a beautiful website with just a few clicks – there is even an image editor within the builder!

How to edit the images you use for your website

Caucasian male with a long beard is sat at a desk in front of a laptop editing photos with camera equipment surrounding the laptop

The visual aspect of website design can attract or turn away visitors, therefore when creating your website it is important to choose images that create an impact and relate to your brand.  Rather than just focusing on the content of the images, however, it’s vital to make sure that you take into account other aspects, such as file type and quality to really highlight your website and make it stand out from your competitors. Here are some considerations we think are really important to take into account to make your website leave a lasting impression.

Think about the quality of your images 

The quality of your images can significantly impact the way customers view your website and your brand. High-quality images imply a professional service and instil more trust in your brand for customers than images of low quality. The best ways to achieve high-quality images is either by taking them yourself (see our article on How to Take Great Product Photos) or by using stock images to ensure the quality is high. 

Know the type of file you need to use

When adding images to your website it is important to know the type of file you need to use, generally, this is a choice between a PNG file and a JPG/JPEG file. A PNG file is a larger file, which creates higher quality images than a JPG but can slow your site speed down if used for every image. A JPG file, however, is used more frequently as the file size is smaller; the only compromise is that its image quality is slightly lessened. 

Think about composition  

A good website will have images which engage the visitor and mean something to the brand or subject matter. Therefore the composition (how the image is ‘staged’ and shown to the viewer) should be taken into account when selecting your final images. A simple crop can change the focus of an image and make it more relevant when building your website. The built-in image editor on Go Sitebuilder is a perfect addition when cropping your images as you can visualise how small changes can impact how the image is shown on your website.

Aspects such as colours, filters and stickers

Depending on your brand image, aspects such as colours, filters and stickers can portray the personality of your brand. For example, a travel website may benefit from brightly coloured images to show locations in the best light, whereas a beauty website may have more use for filters.

If you are looking to build a website for your company, then look no further than Go Sitebuilder! Our simple design means you can have a professional-looking website up and running in minutes, and we even have an image editor incorporated in our software. Try our 14-day free trial today!

The best tools or websites to create images with text

A male photographer wearing a loose, casual white shirt is stood at a desktop computer editing images whilst a photoshoot is going on in the background

Often an image can portray everything you want to show for your brand, a concise way to represent an idea or a product. With high levels of competition for views on your website it is important to have features that stand out and may be different from other brands similar to yours. 

The technique of combining your images with text can create impactful designs which pull visitors into your website or catch their eye on Instagram. According to GraphicMama, bolod typography and text masking are going to be some of the hottest graphic design trends of 2020. In this article, we will show you the best tools to use when adding text to your images.

The Most User-Friendly: Canva

Canva is a website and an app that allows users to use their own images (as well as canva’s own images) and layer text on top of those images. There is a wide variety of fonts, styles and layouts, allowing a full scope image types. The basic version of Canva is also free, allowing you to try out your design talents before paying. 

The Widest Range of Features: Adobe Photoshop

One of the biggest names in the photo editing business, Photoshop can do it all – at a price. If your website is focused heavily on image quality or maybe you run a photography business and you are familiar with the software this may be for you. With a range of features, including layering text over images, Photoshop is a great tool. However, for most websites, it may be an unnecessary cost considering the other options available. 

For the Aspiring Influencers: BeFunky

BeFunky is an online photo editing tool that allows you to add text to images, and now has a super simple text and image masking tool. This is where you don’t choose a font for your colour; instead, you choose an image. One of 2020’s new graphic design crazes, this technique adds texture to your designs, is perfect for social media campaigns and ensures that you are bang on-trend.

If you are looking to build a website for your company, then look no further than Go Sitebuilder. Our simple design means you can have a professional-looking website up and running in minutes, and we even have an image editor incorporated in our easy to use platform. Try our 14-day free trial today!

Do I need to know Photoshop to build a website?

Female's hands resting on the edge of a desk editing images for her Go Sitebuilder website. A coffee is also on the desk

You’re probably aware that Adobe Photoshop is commonly used to touch up pictures of celebs in magazines or selfies for social media. However, Photoshop isn’t just a tool for vanity, it can also play a role in building your website’s design. Photoshop is a graphics editor, and it can also be used to optimise images and construct page layouts.

However, Adobe Photoshop is both an expensive tool and a daunting prospect if you’re new to editing images. Best of all – you don’t need it! A successful website can be created without Photoshop. Read on to discover how!

Photoshop is used for complex website developing tasks

Photoshop is used by web developers for a variety of reasons. They can use it to create a mock-up of a web design so that they can send PDFs to their clients for approval, or to integrate different ideas into one design. You can create a beautiful website design in Photoshop, but it is complicated, time-consuming and difficult to export if you’re inexperienced. 

Even now, Photoshop for professional web development is falling by the wayside as modern website design and creation is written directly in code. 

There are easier ways to edit your images

Photoshop is mainly used to edit photos, and it’s no secret that good images are paramount when they are to be used on your website. If you’re worried about your pictures not standing out, worry not – nowadays, there are much easier ways to edit your photos; countless apps offer similar services to Photoshop.

Online photo editors such as Fotor and Canva are a great alternative to Photoshop, and you can also download free image editing software to be able to edit offline. Another huge plus is that they are completely free, whereas Photoshop comes with a fairly steep price tag. 

There are website builders that already have the answers

If you want to build a website but don’t think you’ve got the technical know-how – we’ve got you covered! Go Sitebuilder has ready to go, customisable websites at your fingertips. Don’t let a lack of Photoshop or coding knowledge put you off building an online business – Go Sitebuilder also has an image editor to help you build the best website. Our 14-day free trial gives you all the freedom needed to create the perfect online business.

What is the best free photo editing software?

What is the best free photo editing software?

Got an image that would be perfect for your site if only it wasn’t just a little too dark? Or are you looking to grayscale an image to have as a classy background? Either way, you’re going to need a photo editor, but if you don’t want to pay the monthly fee for Adobe Photoshop, then we’ve compiled a list of some of the best free editing software you can use to make your website look amazing. 

GIMP

The GNU Image Manipulation Programme (GIMP) is one of the best free photo editors you can find. It’s full of a multitude of tools that you’d find in paid alternatives like Adobe Photoshop, but without needing to spend a penny!

A benefit of GIMP over other photo editors is that it allows you to create layers of edits, and has a smart selection tool if there are specific areas you think need enhancing. It is open-source software, which means there is a large community of users and developers who are constantly creating new features for you to use, but it does involve quite a steep learning curve if you’re completely new to editing images.

InPixio Free

If you’re looking for a quick and simple way to edit your images, then InPixio is the software you’re looking for! It boasts hundreds of one-click filters that you can use to instantly make your image stand out from the crowd. 

It also has automatic online sharing capabilities, which means you can send images to clients or customers with one click, rather than exporting the file first. It also supports all image formats, so from .png to .jpeg, you’re ready to edit!

Adobe Photoshop Express

You’ll have noticed from the name – this is Adobe Photoshop, but pared down to make it available without having to pay a monthly subscription. Designed for easy and fast editing, the software has a one-click auto-fix option, as well as filters, creative borders, and automatic red-eye removal. 

If you want more of a hands-on approach though, there are more intricate tools that can help you edit your image precisely how you want it. 

If you’re planning to build a website and you want it to look as impressive as possible, then why not check out our 14-day free trial? Our own photo editor is easy-to-use with stylish filters, options for stickers, text overlay and much, much more!

How do I create a photo gallery for my website

Female photographer sat at a desk with a laptop and image prints and a camera

Why do I need a photo gallery?

Having a photo gallery is an important visual stimulator when viewing a website. It adds colour and vibrancy to a website, meaning viewers are more likely to explore different sections of your site. In addition to this, a photo gallery adds a personal touch to your website: your online business becomes less robotic and more relatable. This is vital if you want to build a relationship between your site and the customer. The beauty of a photo gallery is that it is completely personal and customisable, enabling you to build your website in your own image. 

What tools can I use to create a photo gallery?

It is super simple to build a photo gallery. Juicebox is a great place to start for beginners: no coding skills are required and its simplicity means you can create HTML5 image galleries with ease. It is adaptable, as it can be accessed either on your computer or via mobile. Another huge plus with Juicebox is that it is free! 

Gallery Studio 1.1 is an alternative free option: its software leaves no watermarks on your images, ensuring your gallery remains personal to you.

Photo Gallery Builder 1.4 is another helpful tool if you want to create a photo gallery for your website. It requires no prior knowledge of Adobe Flash and its modern interface will leave your gallery looking professional and sophisticated. 

What next?

As you’re probably now aware, having a photo gallery for your website is of high importance. Condensing all your images into one folder means viewers of your site can access your pictures with ease. 

However, if you’re still unsure about how to create a photo gallery for your website then Go Sitebuilder is a fantastic solution. Our website builder is easy to use, and has ready to go tools within our editor to help you create the perfect photo gallery for your website – no need to use external software!

Alternatively, if you already have a collection of photos but don’t know what to do with it, then Go Sitebuilder is one of the best online site builders. Its simplicity ensures you can upload your images hassle-free and our free 14 day trial period gives you all the freedom to build your online business today!

Where can I find stickers to put on photos

A group of three young entrepreneurs at a desk looking at a tablet device the male is standing and looking over the shoulders of the two females sat down

Adding stickers to your photos can be a fun and quirky way to liven up your image. Whether you’re starting up a blog or building your own online business, stickers add a contemporary and relatable edge to any image, making it individual to you. And the best thing about customising your photos with stickers is that it is completely free and super easy to do!

For social media fans

The easiest way to add stickers onto your image is via social media apps such as Facebook Messenger or Snapchat. Snapchat stickers are our personal favourite as they let you create add your own bitmoji stickers (a cartoon avatar of yourself which you can create via Bitmoji). This helps viewers identify you as the content creator and makes your online presence slightly more human. 

For iOS and Android users

Downloading an app is a really convenient way to put stickers onto photos. Pics Art Photo Editor provides you with a step-by-step guide to follow. It gives you complete flexibility to personalise your own images by syncing photos from your camera roll to the app. What’s more, it has a huge range of stickers to choose from, although don’t let its sheer variety deter you: its search bar lets you find the perfect sticker quickly and effortlessly. Another app you can download is FotoRus. Their addition of Emoticon stickers means your images can become expressive and fun to view. 

A web-based alternative

If you prefer to edit your computers on your laptop, Fotor is a tool you can use to add stickers to your photo via the computer. It adds a professional look to your image by creating a theme specific to the sticker you select. It also provides you with the opportunity to create collages for your images, giving you full reign to be as creative as you want when customising your picture. 

By putting stickers onto your images, your online business becomes more identifiable – the first step in creating an online brand! This is of particular importance when building your own online website. Go Sitebuilder makes this all the easier, with ready to go websites for you to use to boost your online presence. Try our free 14-day trial to start building your online business today!

How to stamp the copyright logo to my images

Black female food blogger taking a photo in a cafe wearing a light blue shirt and red hair bandana

Imagine: you’ve spent lots of time creating the perfect image to upload onto your soon-to-be website. It is eye-catching, unique and perfect for your online business. But, although this image is legally owned by you, the internet is a dark place and someone snatches up your image for their own purposes. Suddenly, your image is no longer identified with your online business. All that time and effort spent sourcing this image is wasted. 

So, how do you avoid this case of online theft? Well, the answer is pretty simple. By stamping a copyright logo onto your images, keyboard thieves will fail to pass off your content as their own. 

Step 1: Choose your software 

Adobe photoshop, Inkscape or Paintshop are the most obvious editing softwares to do this. However, if you don’t fancy spending your money on these, then there are multiple free photo editing softwares which you can use to watermark your image instead.    Alamoon Watermark, WatermarkLib and Kigo Image Converter can all be used to stamp your copyright logo onto your image. 

Step 2: Where to put the copyright

Open your image in one of these programmes and select the section of the image where you want to add your copyright stamp. Make sure your text goes in a place which is visible. This ensures would-be users cannot get rid of your logo without destroying the image itself. This is important – strategically picking a location for your text to go into means digital thieves cannot steal your image without shooting themselves in the foot.

Step 3: What information do you need to add?

When applying a copyright stamp, you need to make sure you include your name/business name, the year your image was created and the copyright symbol ‘©’ into your text. This way you are solidly safeguarding your image from being swiped up by someone else. Although you can’t stop people from downloading your image free of charge, your name will now always be affiliated with this image. Remember, it is important that you lower the opacity of the text so that people can still see your image!

Now that your image is protected and associated with you, it is important you have a website that people can visit if they want to access your material. Check out our 14-week free trial of Go Sitebuilder and see just how easy it is to get your business online!